
Hello October Pumpkin Planner Dashboard
Happy Sunday, friends! Grab a good cup of coffee or tea…because, on today’s blog I’ll be sharing with you how I’ve made my October’s planner dashboard along with three Fall greeting cards, Yasss… you read that right! Three Fall Greeting cards using; the beautiful Fall Bouquets Dies by Honey Bee Stamps So… without further ado, let’s get started! ↓

To begin with, I started by running through the die-cutting machine pieces from a Canson Watercolor Paper 9 X 12 in sheet along with each of the dies from the Fall Bouquets Dies. Next, I mixed different shades of Oranges, Yellows, Pinks, Purples & Greens to watercolor each of the die-cuttings. By the way here are the watercolor pallets that, I used for my water coloring;
‒ Terrain Watercolor Collection
‒ Odyssey Watercolor Collection
‒ Complexion Watercolor Collection

Although, I didn’t do fine details on the die-cutting pieces, I did water-colored some of the die-cuttings a bit darker than other to add some dimension and depth in between the layers.

Once, all die-cutting pieces were dry, I decided to add a touch of gold by rubbing the edges of each of the die-cutting pieces on my Embossing Ink Pad then, by dipping the edges into Metallic Gold Sparkle which, soon after the dipping, I heat set them by using the heat from my Heat Embossing Gun Tool until the powder was melted. As, for the planner dashboard layering, I started by using one of the dotted pages from my planner as my base. Then, I adhered the backing of the pumpkin with double-sided tape to the planner dotted sheet. Right after that, I created a Floral Fall cluster decor on top of the pumpkin by adhering together the layers of the three different type of flowers included in the set. As, well as the different leaves as, you can see in the picture above. Lastly, to finish the planner dashboard off, I stamped the little Hello from the Fall Stamp Set with Versafine Onyx Black underneath the pumpkin and, I water-colored a piece of watercolor card stock with the same purple/pink that, I used for the flowers so, the color of the letters matched with the color of the flowers. Finally, right after the piece of watercolor card stock was dry, I used the Tall Alpha Die Set to die-cut the letters out… and soon after that, I adhered the backing of each letter to the planner sheet with liquid glue to create the October word.

If, my planner dashboard was boring for you. Guess what!!!??? I decided to create some Fall Greeting cards with the same concept as, I wanted to share with how I used this beautiful die set.

So, for the card examples I started by running through the die-cutting machine one of the Scallop dies from the Scallop A2 Card Frames Die Set along with three white card panels. Once, I was done die-cutting the three white card panels, I adhered the backing of the first one to a Kraft card base that, I’ve already scored and folded with double-sided tape. Right after that, I layered and adhered the die-cutting pieces to create the pumpkin decor to the first card. Lastly, to create the Fall Greeting I used the Fall Die to cut two of its layers out of white card stock and its top layer out of the same piece of the watercolor piece that, I had used to die-cut the October word. And, to finish the card off, I gold heat embossed the Greeting sentiment from the Fall Stamp Set with Metallic Gold Rich Embossing Powder which right after the heat embossing, I trimmed and adhered underneath the fall greeting with foam mounting tape to create dimension.

For the second card, I used the mason jar included in the die set to create the floral cluster as you can see in the picture above.

So, for the card layering I adhered the backing of the second scallop white card panel to a Kraft card base with double-sided tape. Next, I layered and adhered the vase for the flowers, and then I adhered the flowers and leaves on top of it creating that way the floral cluster. As, for the sentiment, I kept it simple by stamping, heat embossing and die-cutting in the same way as, I did for the first example. Lastly, to finish the card off, I adhered a bow that I created out of a piece of Natural Burlap String and I added some highlight by using my white gel pen to the flowers.

For the third and last example, I skipped the pumpkin and vase as, I adhered the flowers and leaves that, I have leftover in one of the lower corners of the last scallop cad panel.

As, you can see I also change the placement of the sentiment by adhering it on one of the top sides of the card panel. Lastly, after the sentiment, flowers and leaves were adhered to the card panel. I adhered the backing of the card panel to the Kraft card panel… and all today’s cards and planner dashboard were done.
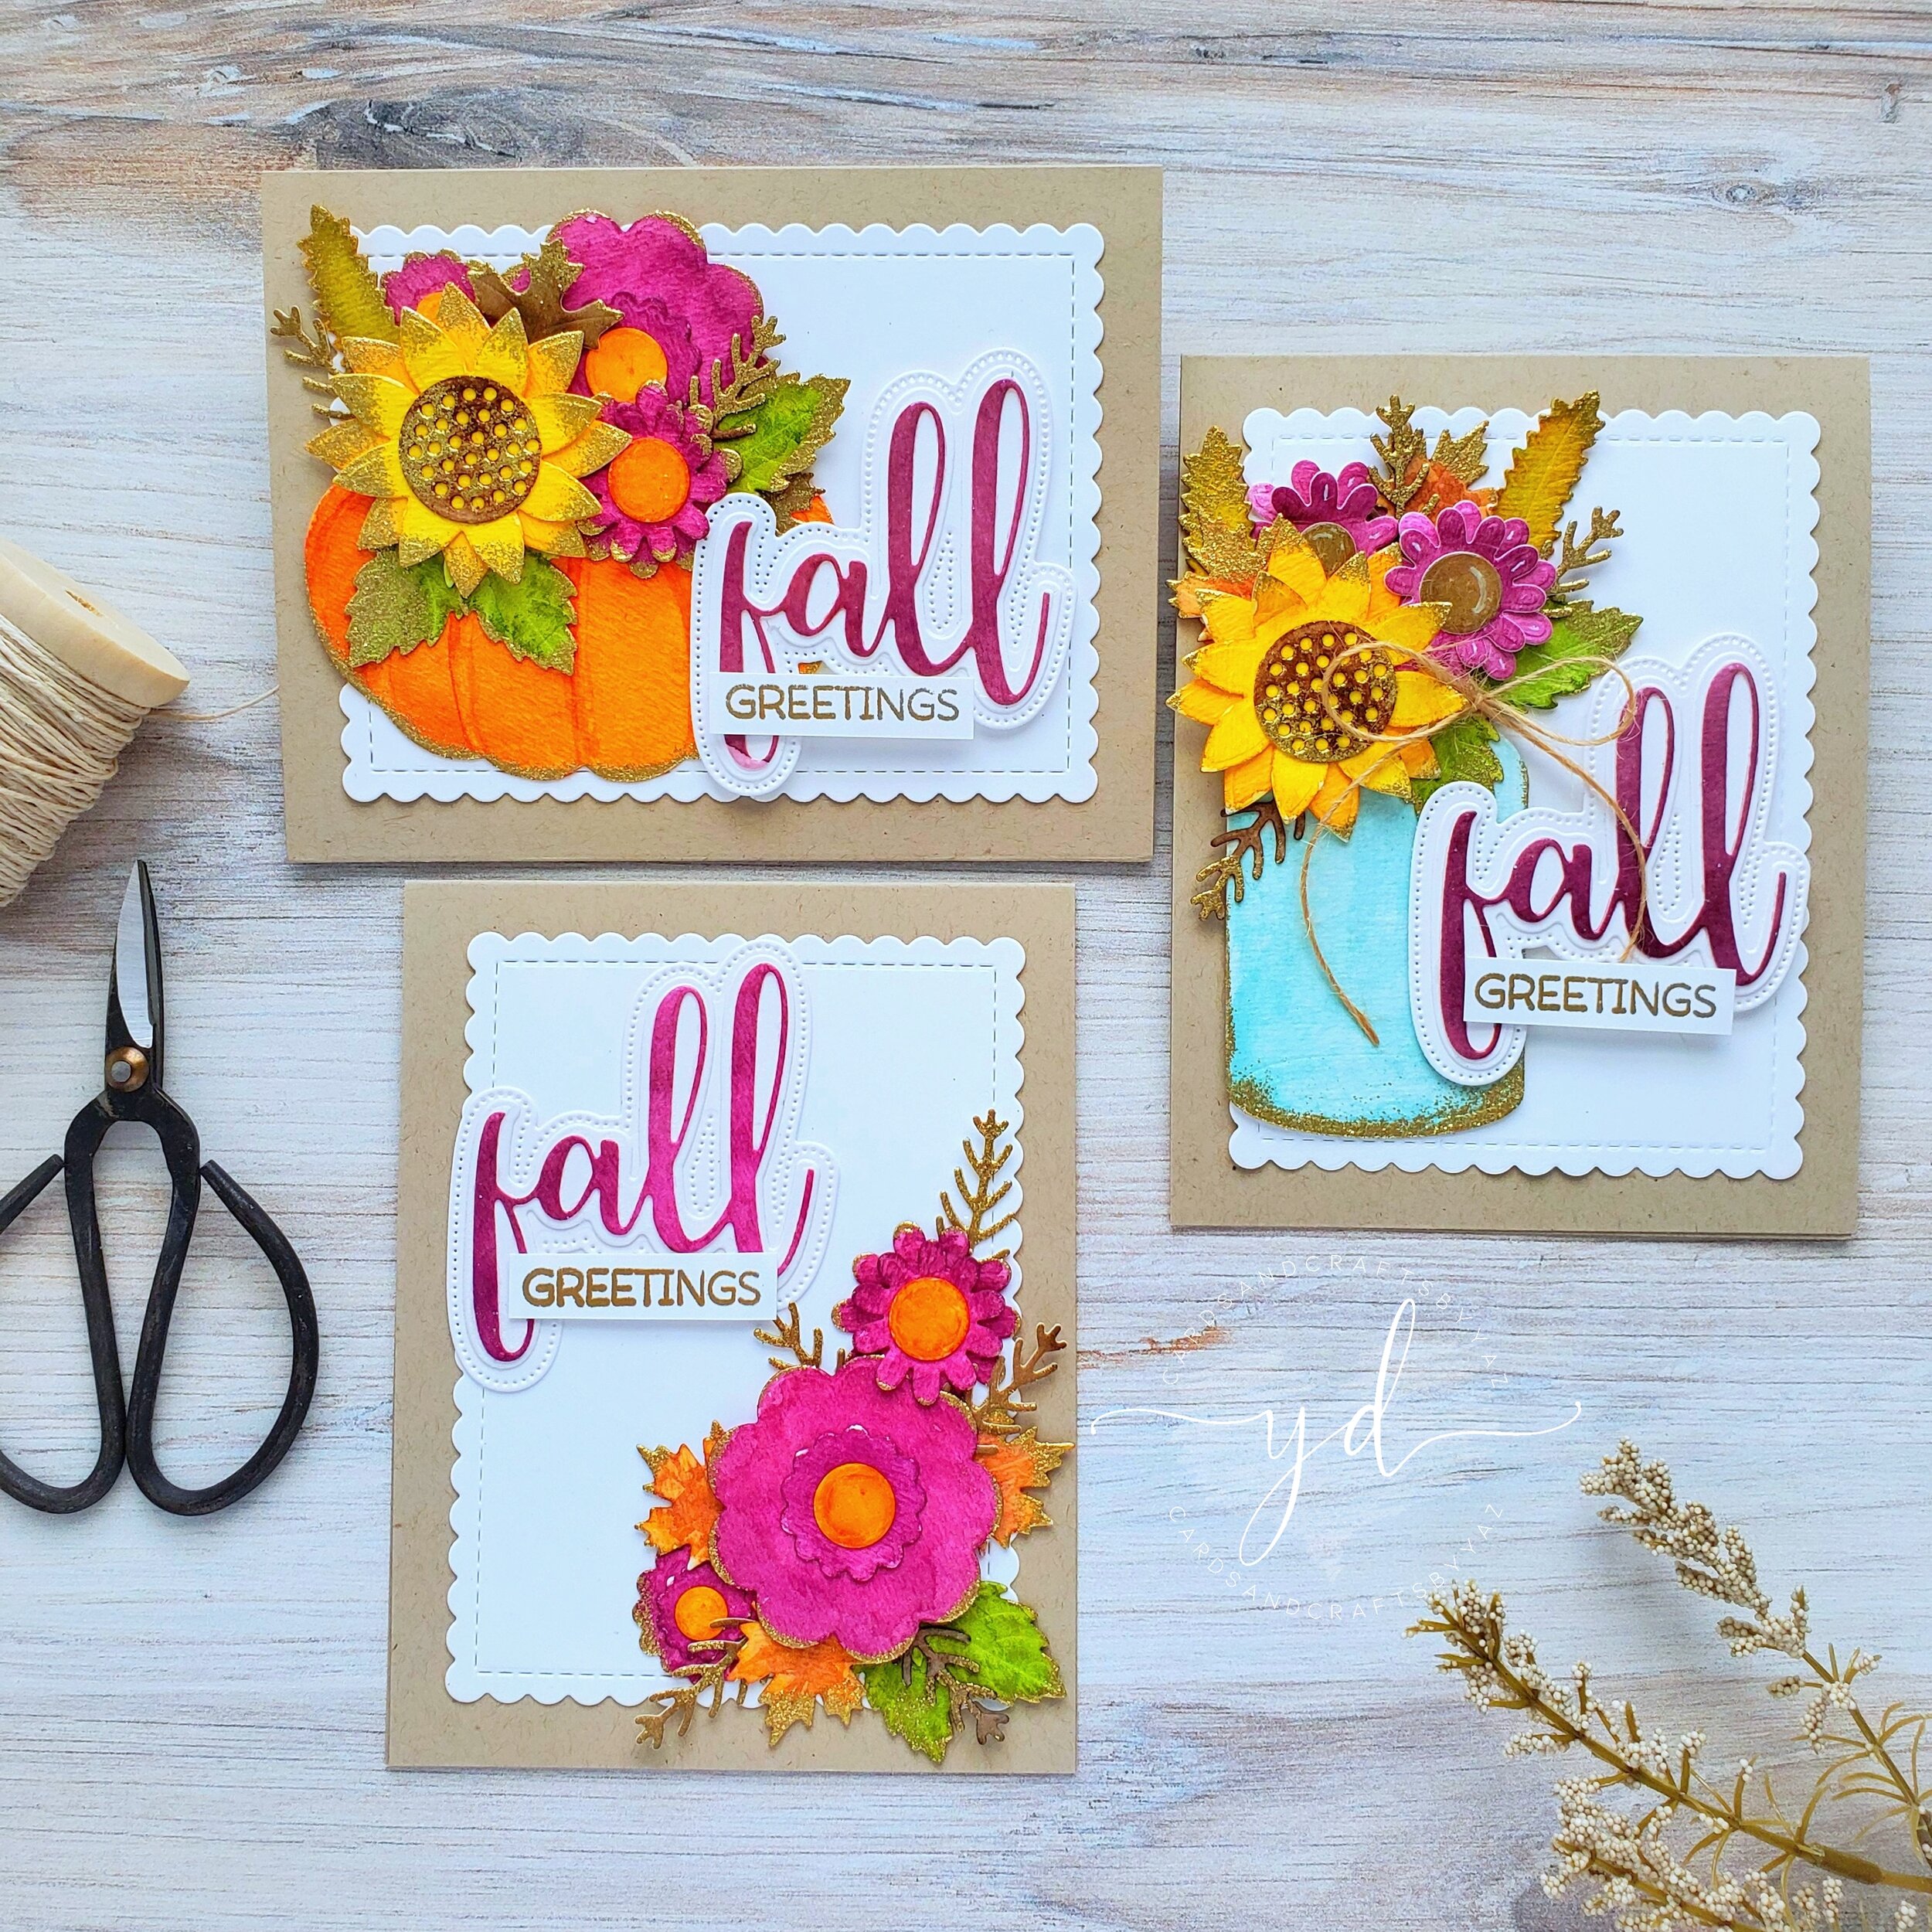
As a finishing touch, I decided to add Glossy Accent to center of the flowers for a shiny look.
Note: I forgot to mention above, that I used Clear Gloss Embossing Powder to clear heat embossing the Fall word for all cards as well as I clear heat embossed the letters for the October word for the planner dashboard. With that being said friends, that’s all I have for today, I hope you were inspired with the cards that; I had shared today. I know it was a lot and I really appreciate it if, you’ve made it to the end. Down below, you’ll find the supply list for the products used for this post.
Thank you and happy crafting, your time is valuable.
Don't forget to keep spreading kindness, Today and Always.
Best,
Yasmin
Supply List
Fall Bouquets Dies
Scallop A2 Card Frames Die Set
Fall Stamp Set
Fall Honey Cuts
Tall Alpha Die Set
Glossy Accent
Terrain Watercolor Collection
Odyssey Watercolor Collection
Complexion Watercolor Collection
Canson Watercolor Paper
Natural Burlap String
Versafine Onyx Black
Desert Storm Card Stock
WOW! Metallic Gold Sparkle
Metallic Gold Rich Embossing Powder
WOW! Clear Gloss Embossing Powder
WOW! Embossing Ink Pad
WOW! Embossing Ink Pad Refill
WOW! Heat Embossing Gun Tool
PLEASE NOTE
As part of the WOW! Designer Team, WOW! has provided me a code for all my lovely Subscribers to use. So, don’t forget to take the advantage of a crafty 10% off all purchase for both WOW!
US and UK by simply by using my code: WOWDTYD
Here are the links for both websites weather you’re a US or UK user.
WOW! Embossing Powder US
WOW! Embossing Powder UK

Your imagination is Your limit.
All photography provided by Yasmin Diaz


Creativity is contagious, pass it on.
–Albert Einstein
Disclosure
I am creating this blog with the purpose of sharing how I design my cards, the information provided here is based in my own opinion and creativity. I am not an expert by any means, and I only share the way that I design my cards. All products used for this blog posts were personally purchased by me. However, I did receive some of the WOW! Embossing Powder products used for this blog post. Please, keep in mind that, all referral links were added for you to know from where I purchased or received the items from as, all of products shared and mentioned in each of my blog posts are simply because I use, and truly love them.