
Stretching out the Leftovers Foil Pieces
Hey friends, happy Monday! On today’s blog I’ll be sharing with you how I’ve stretched out the leftovers foil pieces from a previous project. Last week I shared in a blog post a few cards in which I used gold foil. If you missed that post? you can ➝ (CLICK HERE) to see the previous project. Back to this post, I’m so glad that I’ve learned about how to use foil on top of alcohol inks, because I was able to use what have been left from previous projects without throwing leftovers foil pieces away. So without further ado, keep on reading the blog post!
To begin with I started by adding alcohol solution to 1 of the 2 sheets of yupo paper that I was planning to use, then I used the following alcohol inks:
— Flamingo
— Sunset Orange
— Sunbright Yellow
Once I was done with the first sheet, I repeated the same for the second sheet. The key for adding foil to an inked background is, as soon as you’re done inking the second panel you must go back right away to the first panel and start the foil application. I’ll say no longer the 2 or 3 minutes if you don’t want to lose any stickiness for the foil to adhere to the ink.
Soon after I was done applying the foil to both backgrounds I set them aside until they were completely dry.
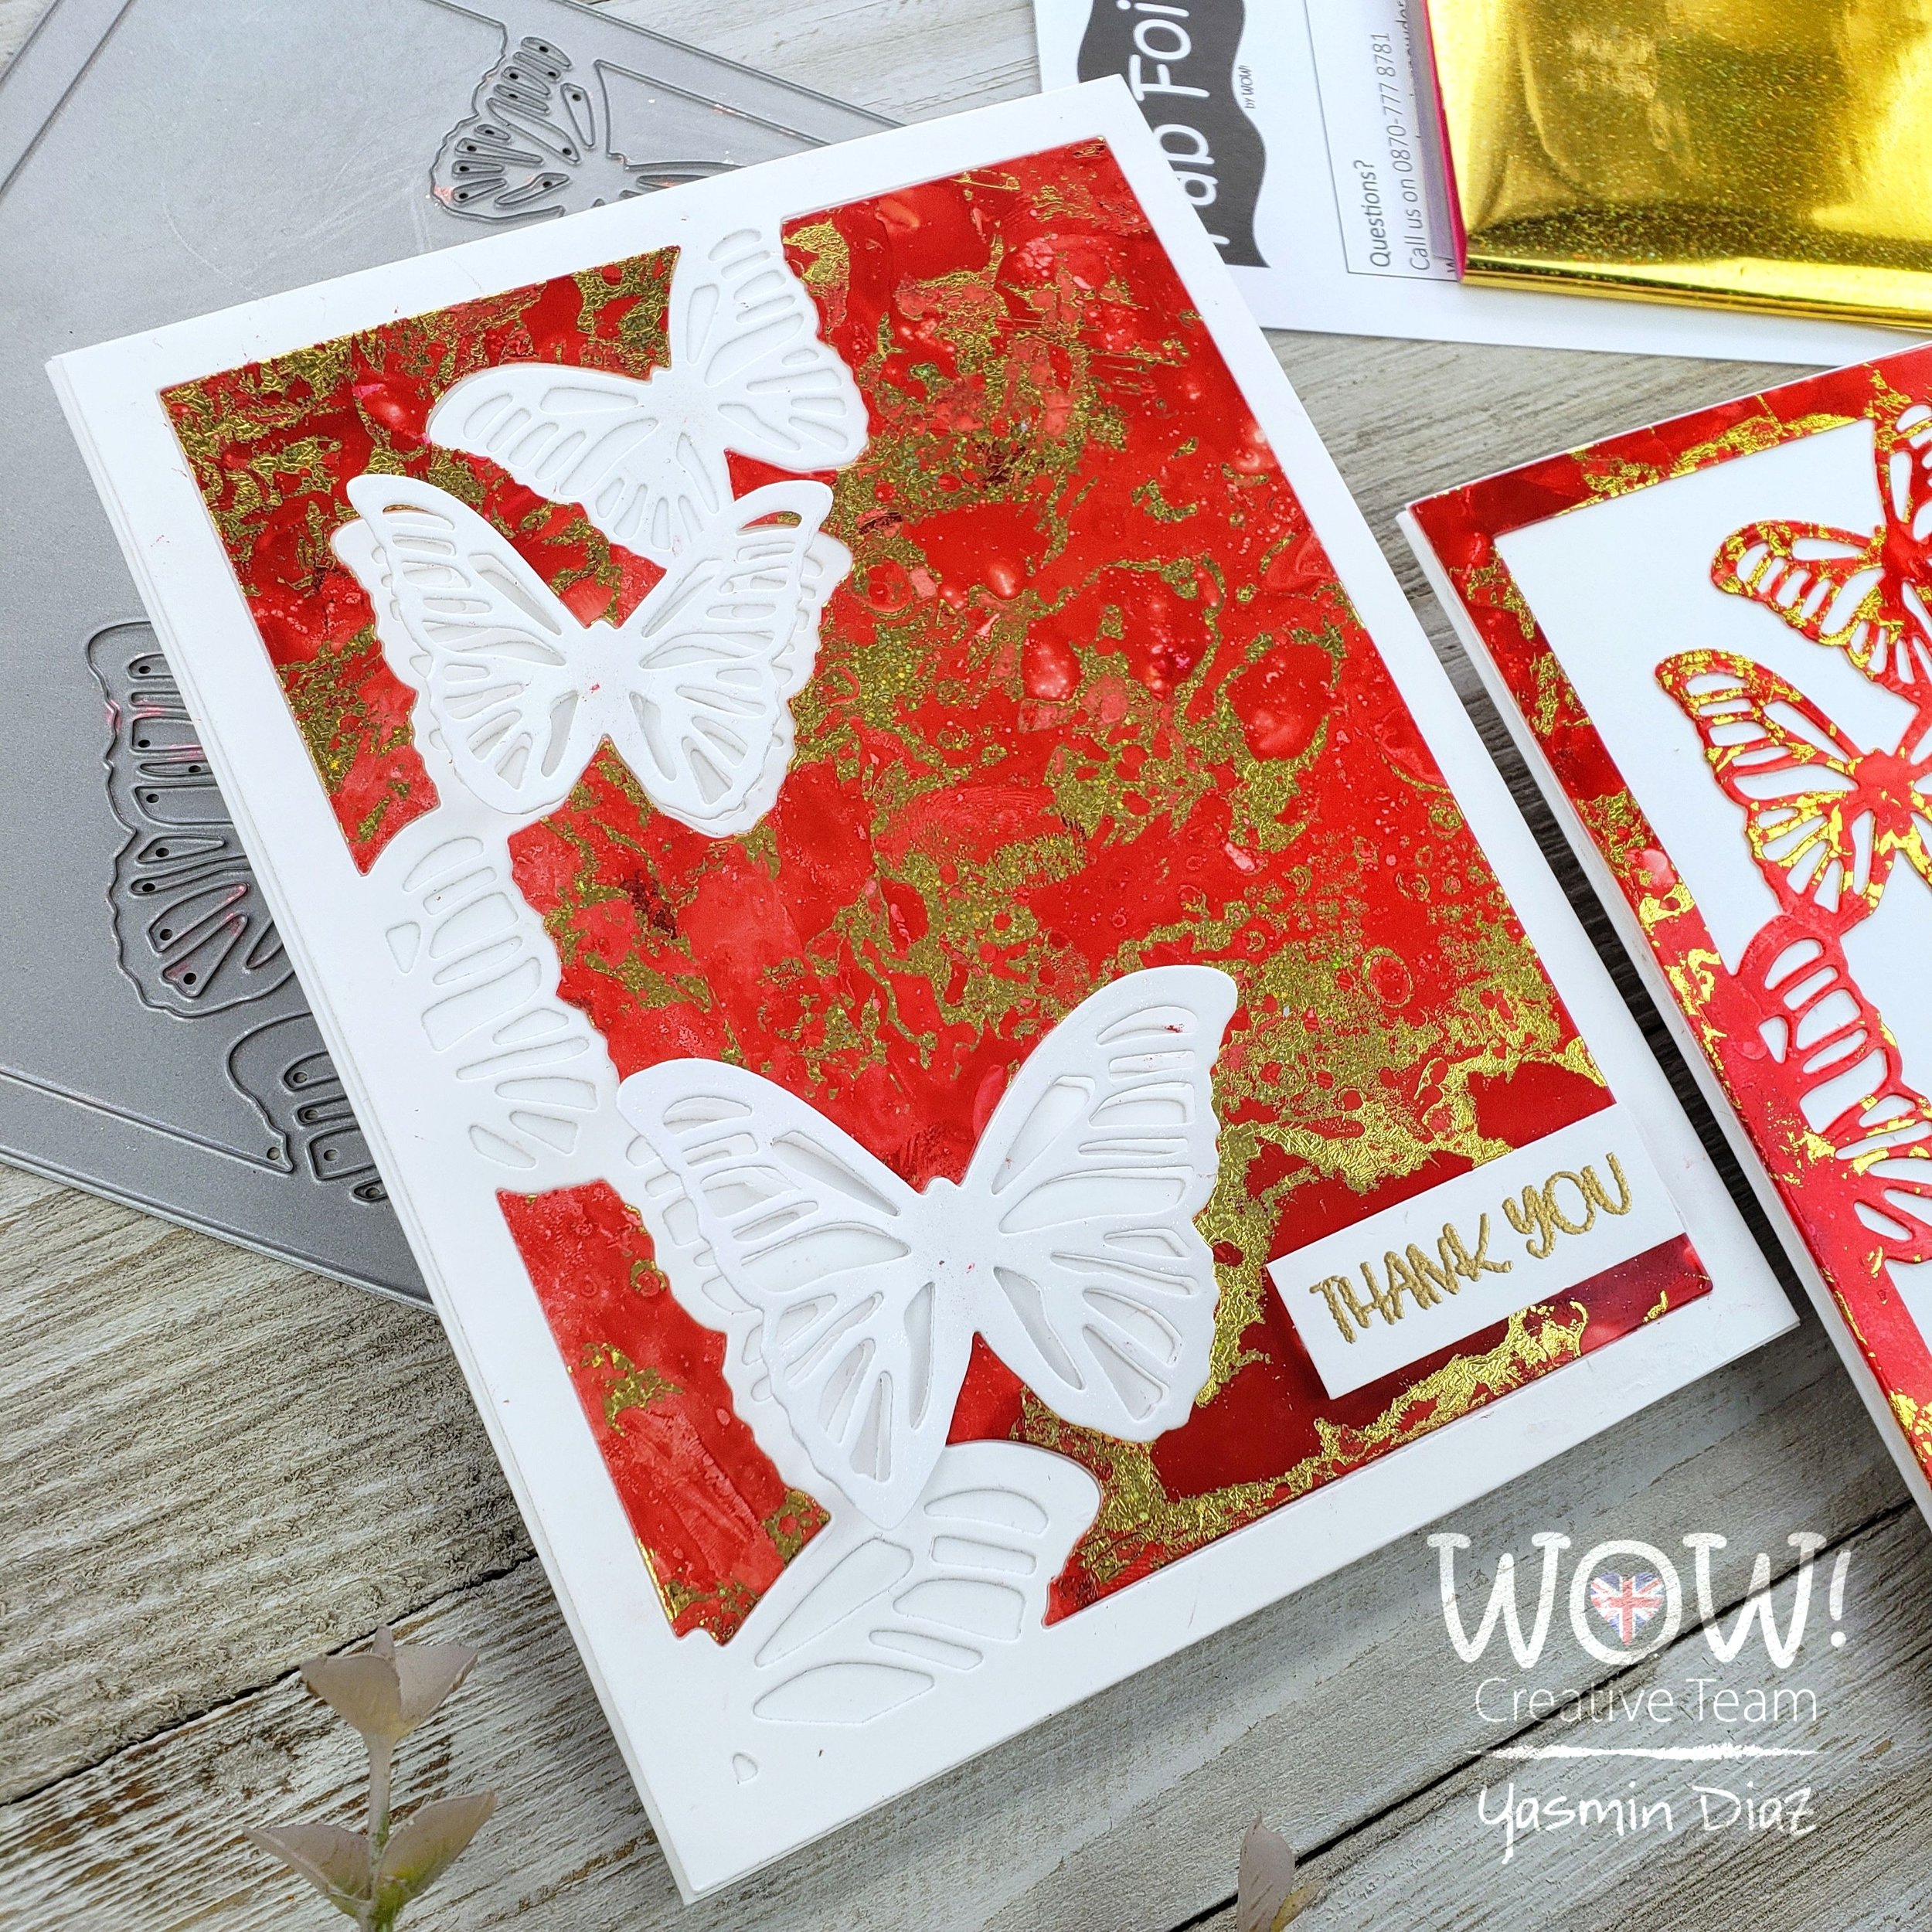
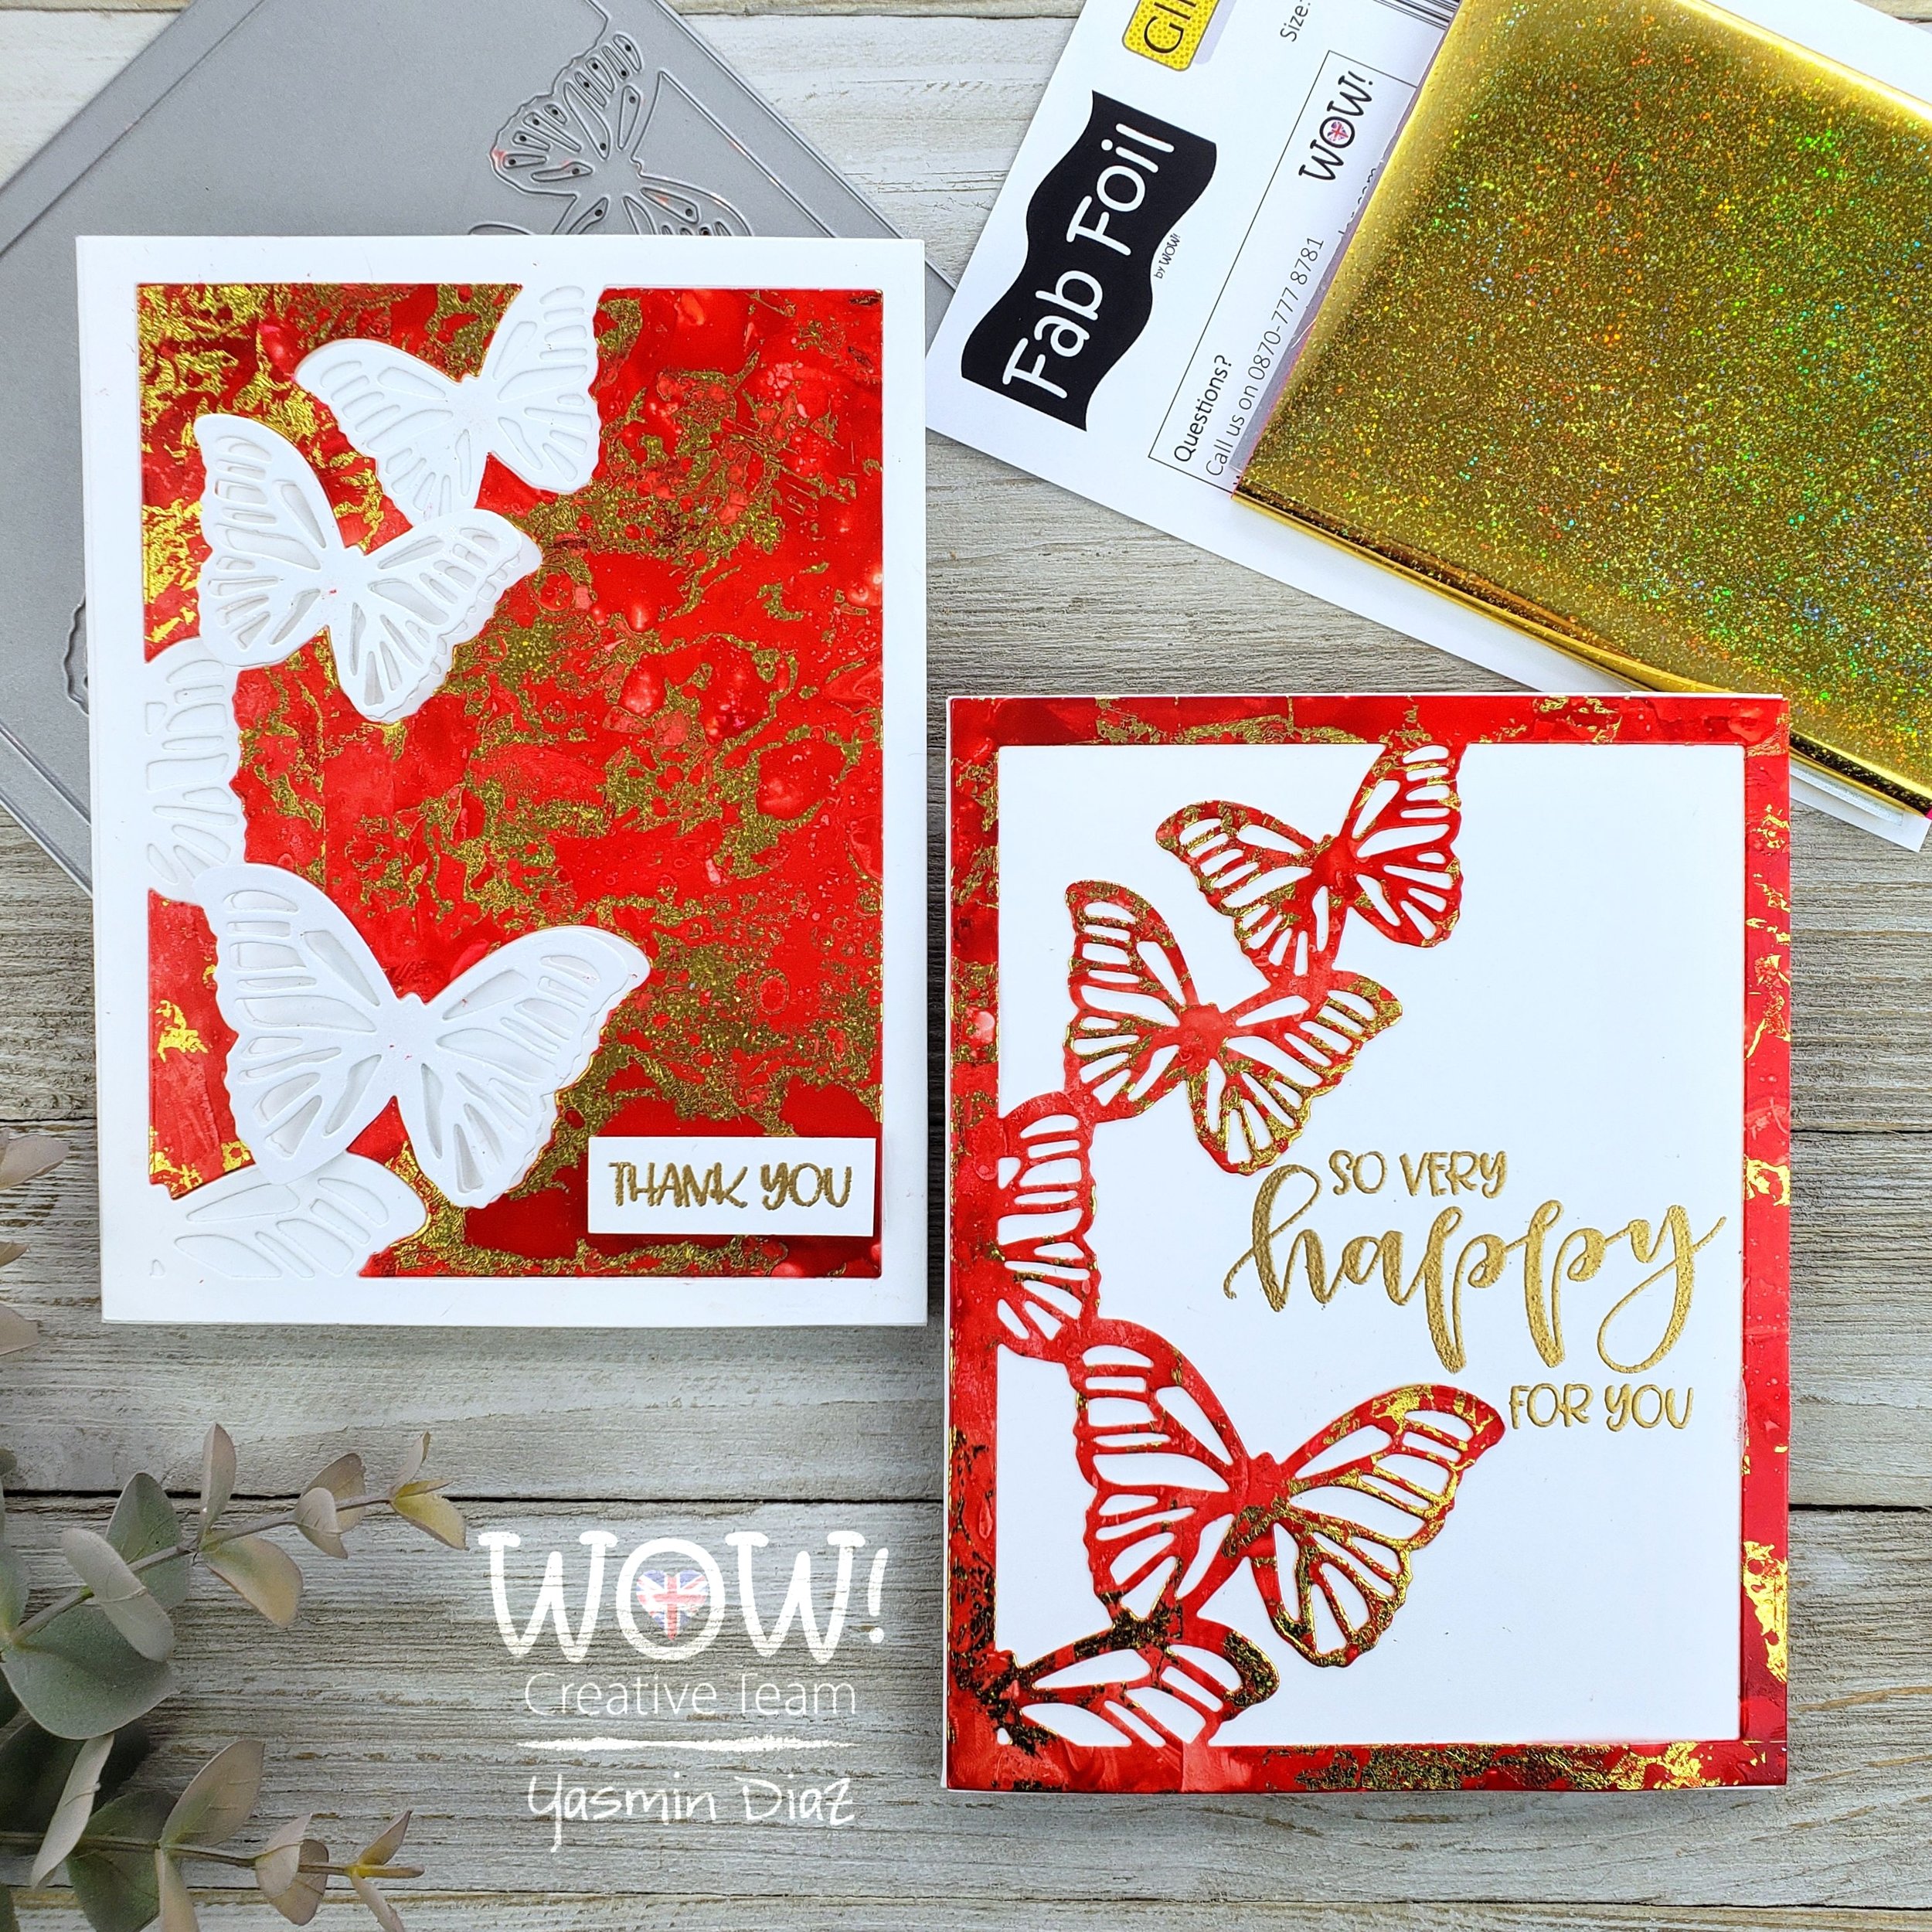
Once they were finally dry out, I trimmed them down in half as I was using yupo sheets that measured W 8.5 X H 5.5 I was able to get 2 card A2 size standard card panels out the sheet. And to stretch them even more I used background dies, and jumbo size dies so I could make 2 cards out of every card panel. For the first example I used this Large Butterfly Frame which I ran through the die cutting machine, once to die cut out of the alcohol inked background, and the second out white card stock which I die cut it twice as I wanted to fussy cut the butterflies from the second to add a little bit of dimension to the card as you can see in the picture above.
Shortly after I was done with all the die cutting, I started by adhering all the pieces to the card panels, for the first card with the solid pieces from the background I decided to gold heat embossing a sentiment which I adhered with foam mounting tape in the lower part of the card. For the second card I decided to gold heat embossed the sentiment right on the card panel, as I had lots of white space on it. To finish these cards off I adhered each of them to a side folding A2 size white card bases.
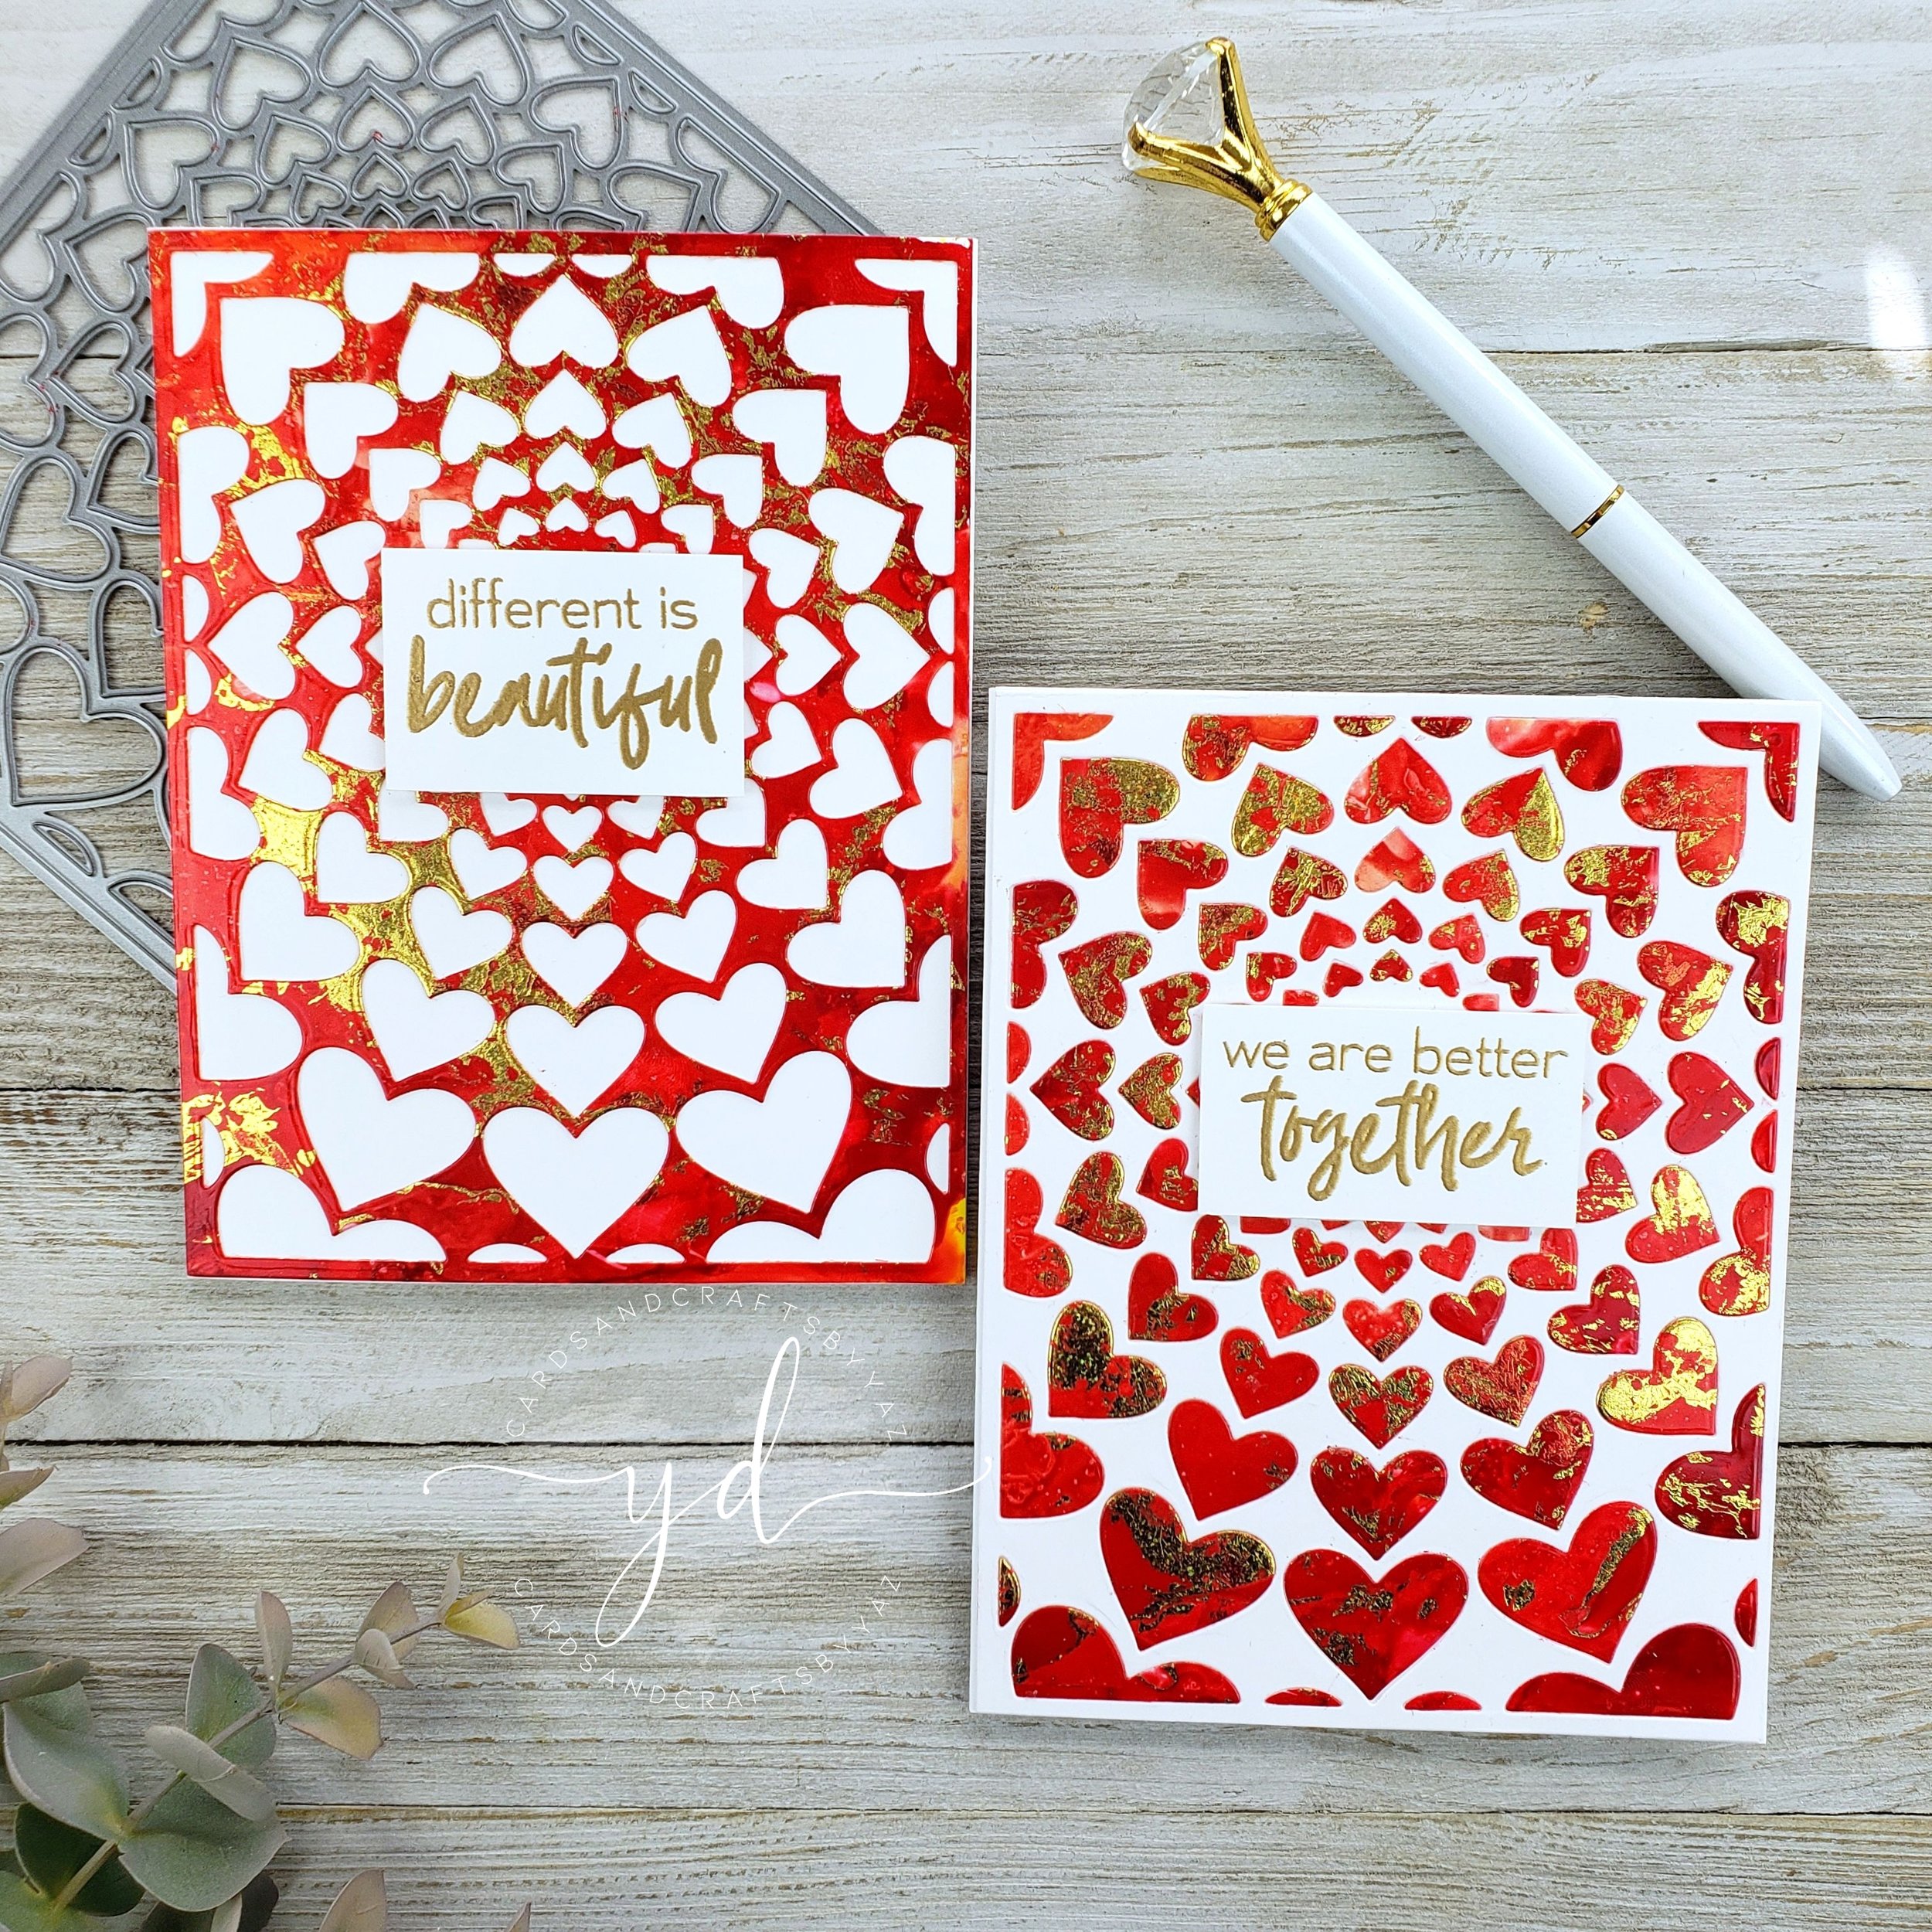
For the second example I used the Radial Hearts Cover Die to die cut the inked background, so I ran through the die cutting machine twice one to cut the inked background, and second to cut out of white card stock. As I was planning to inlay the hearts into the white panel. Once I had the die cutting done I adhered the negative of the die cutting inked background directly to a side folding white card base, and I left it simple without inlaying the white hearts as the white card panel was showing all the white through it. However, for the second card I adhered the white negative die cutting to another white side folding card base, but this time I did inlay all the hearts into it. To finish these cards off I gold heat embossed 2 sentiments and I adhered them to each of the center of the cards.

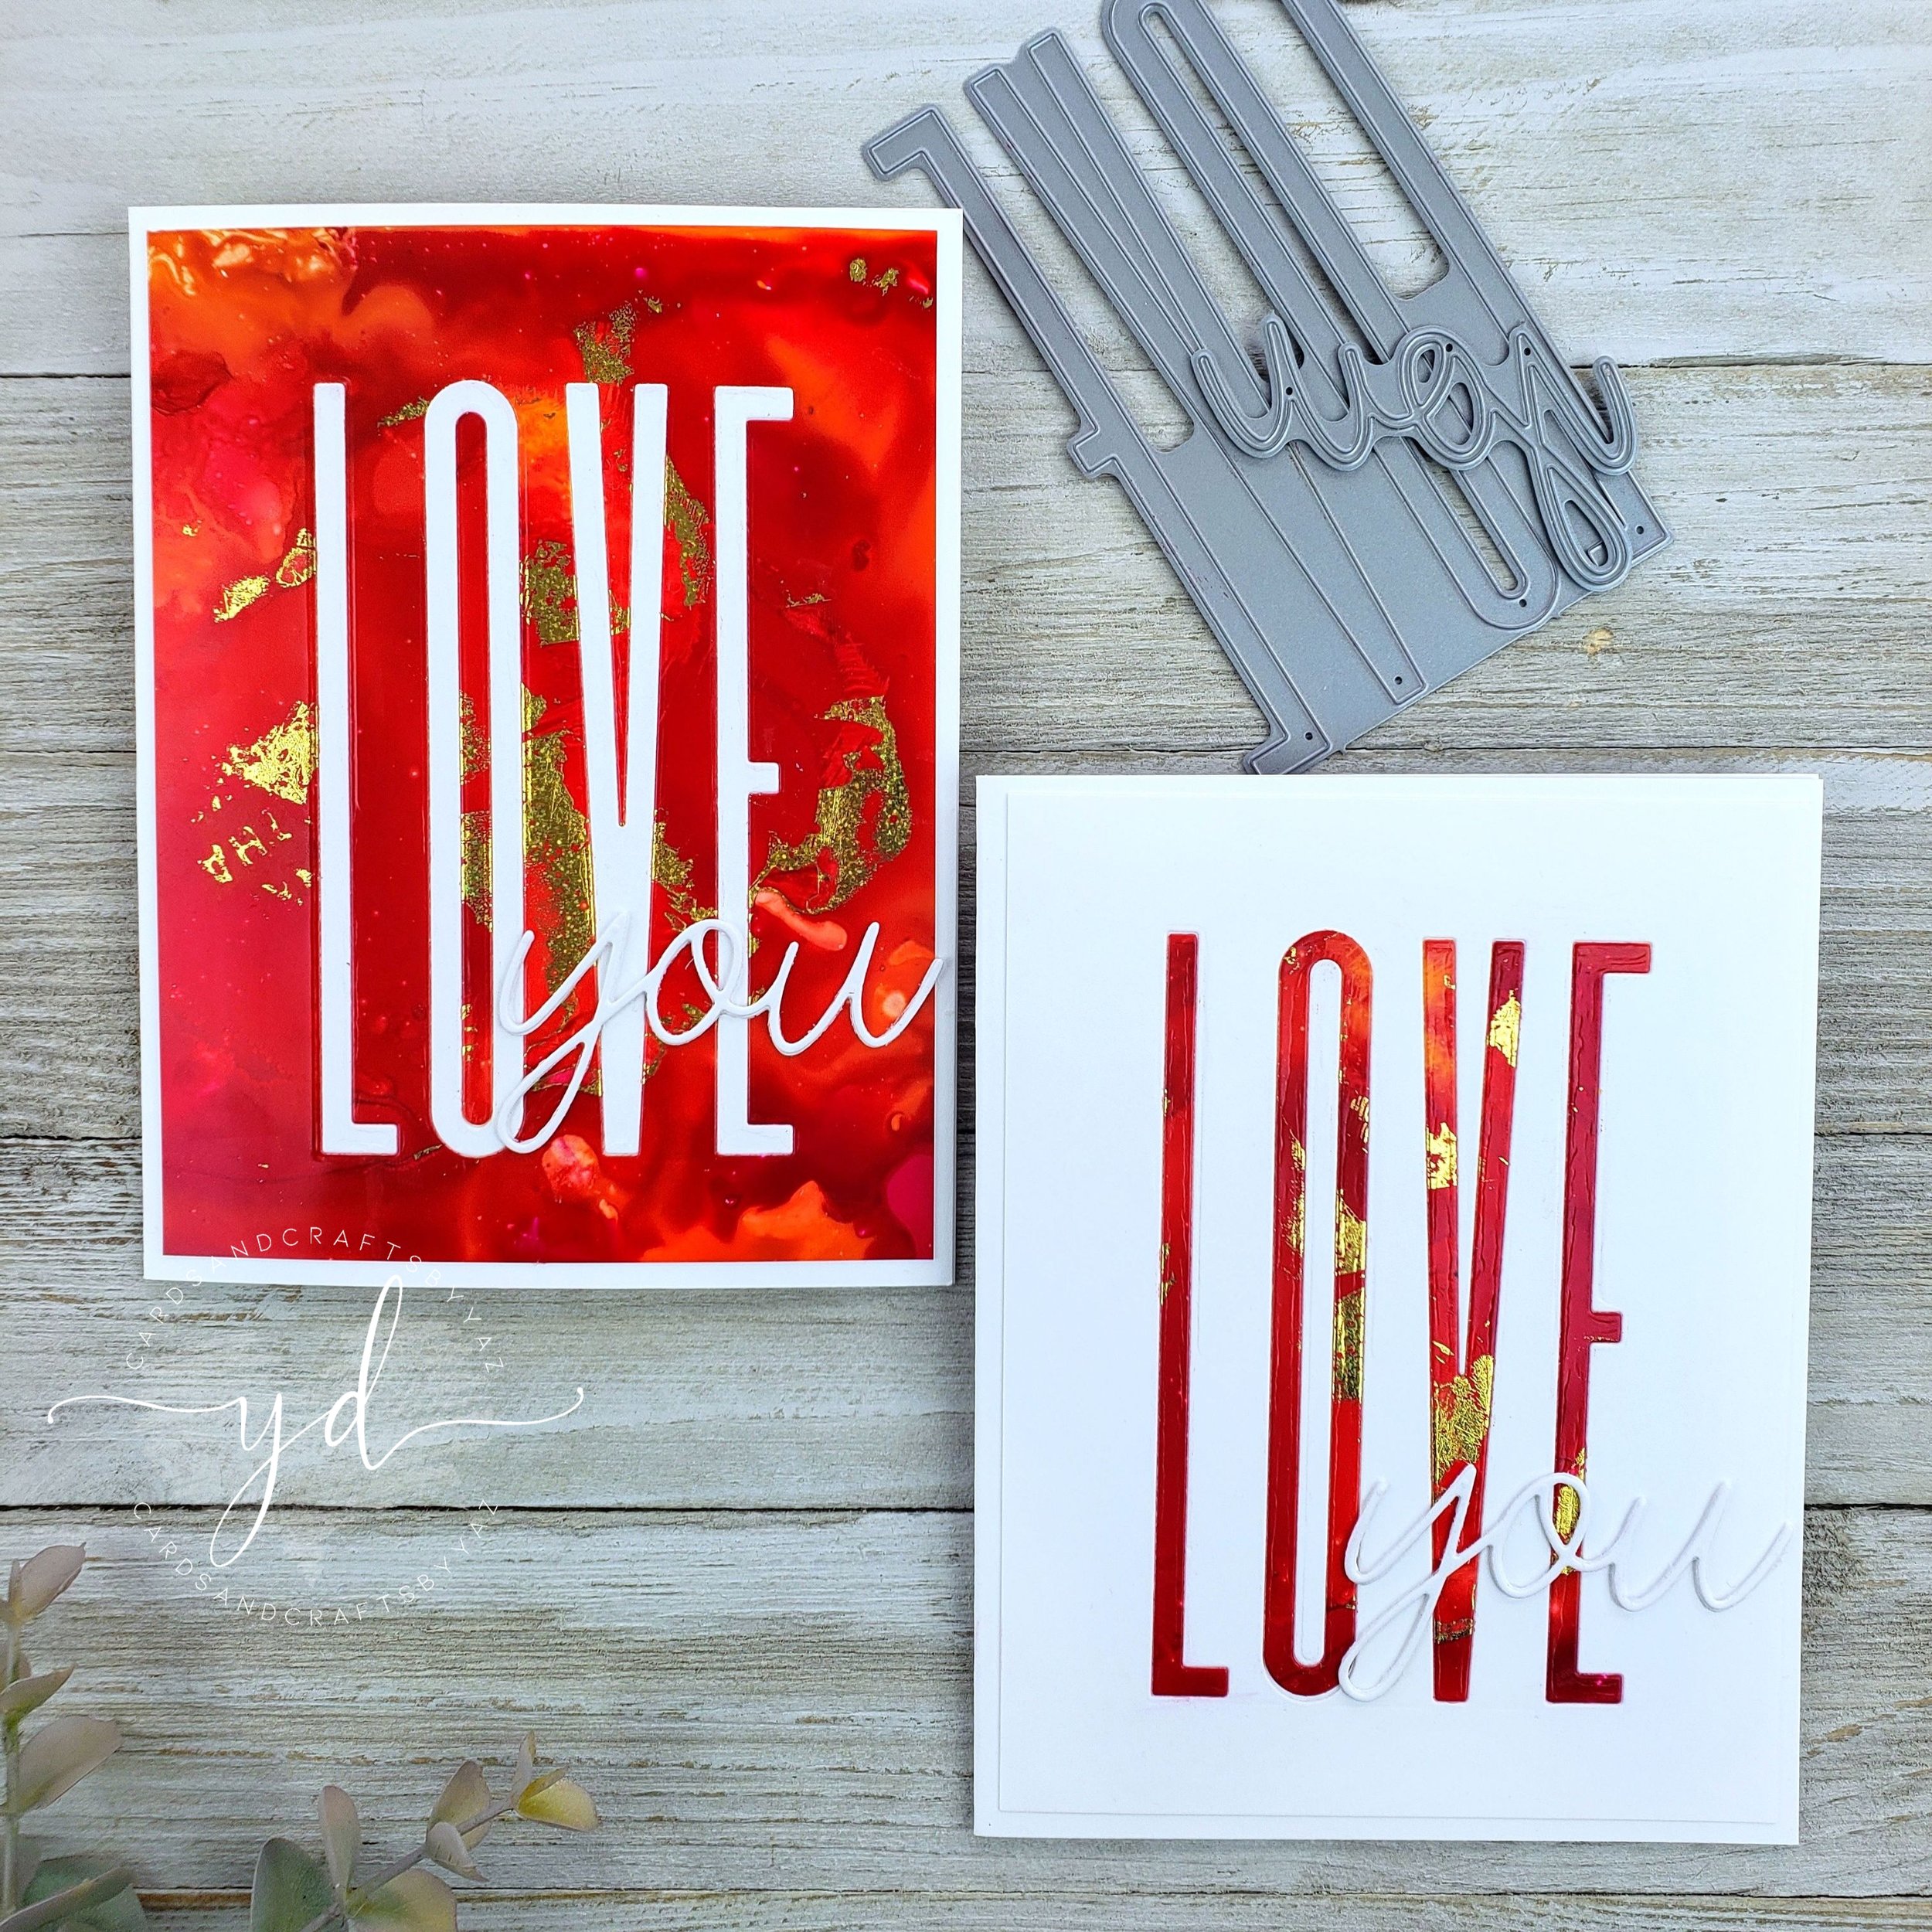
For the third example I use the Mega Love Die for the die cutting, so I ran through the die cutting machine the die one to cut the letters out white card stock, and second out of the inked background. Once I had the die cutting done I adhered the negative die cuttings to the side folding white card bases, then I inlaid the Mega Love into each of them. However, I switched them both for a contrast as you can see in the picture above. To finish these 2 cards off I gold heat embossed 2 sentiments one in a piece of white card stock which I adhered with foam mounting tape to the card, and the second directly on the card panel to compliment the Mega Love word.
Last but certainly not least, for the last example I used another jumbo Love die. So for these 2 cards I repeated the same process as the previous cards. However, I skipped the gold heat embossing as the die itself is completed by having the jumbo LOVE and the YOU words together.
So there you have it, those are the cards that I was able to created by stretching the leftovers foil pieces from my previous projects. I hope you’ve had a great time here with me, as always I appreciate the time you take to read the blog posts. Down below you’ll find the supply list for all the products used in this post, as a referral from where they were purchased from.
Thank you and happy crafting, your time is valuable.
Don't forget to keep spreading kindness, Today and Always.
Best,
Yasmin
PLEASE NOTE
As WOW! Designer Team member, WOW! has provided me a code for all you my lovely Subscribers to use. So, please don’t forget to take the advantage of a 10% off all purchase for both WOW! US and UK by simply by using my code: WOWDTYD
‒ Here are the links for both websites weather you’re a US or UK user.
WOW! US
WOW! UK

Your imagination is Your limit.
All photography provided by Yasmin Diaz


Creativity is contagious, pass it on.
–Albert Einstein
Disclosure
I am creating this blog with the purpose of sharing how I design my cards, the information provided here is base in my own opinion and creativity. I am not an expert by any means, and I only share the way that I design my cards. All of the products used for this blog post were personally purchased by me. However I did received the Fab Foil Glitter Gold from WOW! Embossing Powder Company. All of the referral links were added for you to know from where I purchased the items from. The products shared, and mentioned in my blog posts are simply because… I use, and truly love them.