PFS-Lemon Lush Background Stamp┃Encouragement Cards
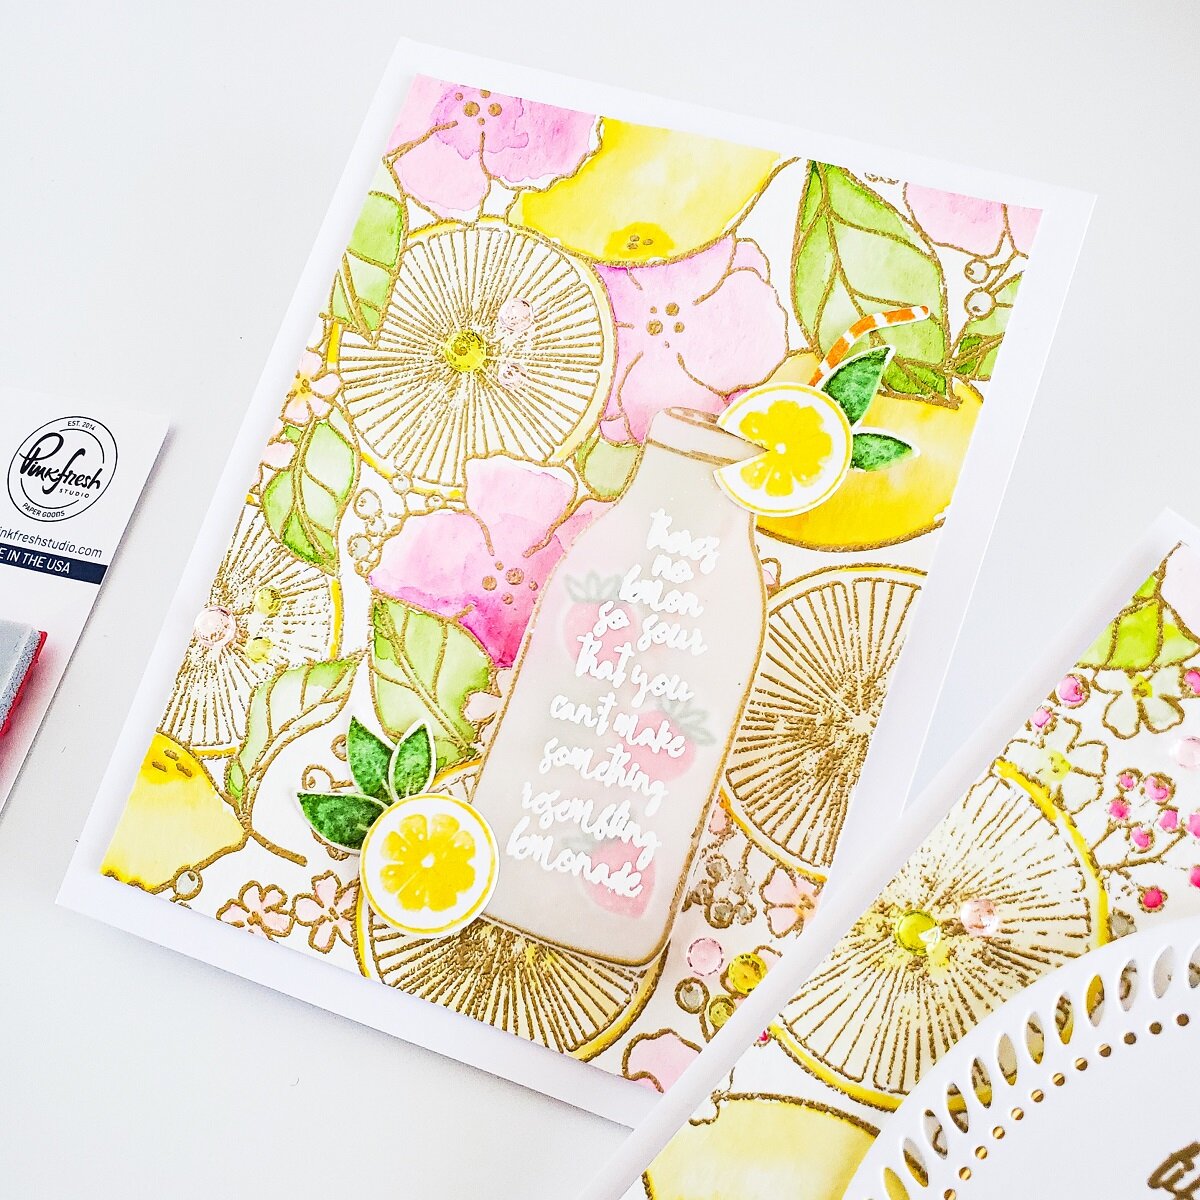
Happy Saturday Friends! On today’s blog, I’ll be sharing with you these 2 encouragement cards that I’ve created showcasing the Lemon Lush Background Stamp by Pinkfresh Studio so, without further ado let’s jump dive into today’s blog post ↓
To begin with, I started by placing a Strathmore Watercolor Cardstock panel inside my stamping tool. Then, I placed over it the Lemon Lush Background Stamp. Once, the background stamp was in place, I picked up the stamp with my stamping tool door, and I added to the card panel Embossing Powder Tool because, I was going to stamp the background stamp image with Embossing Ink creating that way a sticky surface for the Metallic Gold Rich Embossing Powder to stick to it. Right after the stamping, I added the embossing powder and I heat set the powder with my Heat Embossing Gun Tool until the powder was completely melted.
After my first card panel was completed, I repeated the same step to gold heat emboss a second card panel in the same exact way as I did for the first one. So therefore, after heat embossing the second card panel, I placed one of the card panels on my Mini Media Mat and I made a quick and easy water-coloring with Pink, Yellow, Orange, Green, Gray and Peach hues.
Right after when the water-coloring on my first card panel was complete, I set it aside and I water-colored the second card panel in the same way that I did on the first one. However, I made slightly changes which you’ll see below when we get to the second card. So, after the water-coloring process was done, I set the card panels aside to dry.
In the meantime, I stamped on a piece of white cardstock the Lemon slices, Strawberries, Leaves and the Straw from the Sweet Lemonade Stamp Set using; Sweet Mustard Ink Pad, Olive Ink Pad, Grassy Knoll Ink Pad, Passion Fruit Ink Pad. As soon as I was done stamping the images, I ran them through my Platinum 6 Die Cutting and Embossing Machine along with their coordinated dies. Then, after the die-cutting pieces were finished, I gold heat embossed over translucent vellum the bottle, and last but certainly not least, I white heat embossed a sentiment both included in the same set. Lastly, I trimmed the edges down (W 3-3/4’’x H 5.0’’) from one of the card panels, and I mounted the card panel with foam mounting tape to an A2 top folding white card base. Finally, to finish the card off, I adhered some of the die-cutting pieces with liquid glue and some with dimensional square adhesives (as shown above) as, a finishing touch I glued down here and there Yellow and Pink jewels from my Essentials: Crystals Mix for a sparkly touch.
As, I mentioned early here you can see the slightly changes that I made for the second card panel. (White little flowers instead of Pink and Pink berries instead of Gray)
So therefore, I trimmed down the edges from the second card panel and I mounted it with fun foam to an A2 top folding white card base.
To create the focal point for this card, I ran through the die-cutting machine the small die from the Essentials: Braided Oval Die Set to die-cut the oval out of white cardstock. Lastly, I gold heat embossed a sentiment in the center, and I mounted the oval with foam mounting tape in the center of the card. To finish the card off, I glued down here and there Pink and Yellow jewels to complement the look for both cards.
With that being said, that’s all I have today. If you get inspired from today’s example, don’t forget to tag me on Instagram @cardsandcraftsbyyaz, I’d like to see what you create plus, don’t forget to leave a comment below.
Thank you and happy crafting, your time is valuable.
Don't forget to keep spreading kindness
Today and Always
Love,
Yasmin
Supply List
Lemon Lush Background Stamp
Sweet Lemonade Stamp Set
Sweet Lemonade Die Set
Essentials: Braided Oval Die Set
Essentials: Crystals Mix
Sweet Mustard Ink Pad
Olive Ink Pad
Grassy Knoll Ink Pad
Passion Fruit Ink Pad
Mini Media Mat
Metallic Gold Rich Embossing Powder
WOW! Embossing Ink Pad
WOW! Embossing Ink Pad Refill
WOW! Heat Embossing Gun Tool
Inkadinkado Embossing Powder Tool
Strathmore Watercolor Card Stock
Cougar 110# Heavy Weight Card Stock
Platinum 6 Die Cutting and Embossing Machine
As part of the WOW! Designer Team, WOW! has provided me a code for all my lovely Subscribers to use. So, don’t forget to take the advantage of a crafty 10% off all purchase for both WOW!
US and UK by simply using my code: WOWDTYD
Here are the links for both websites weather you’re a US or UK user.
WOW! Embossing Powder US
WOW! Embossing Powder UK
Your imagination is Your limit.
All photography provided by Yasmin Diaz
Creativity is contagious, pass it on.
–Albert Einstein
Disclosure
I am creating this blog with the purpose of sharing how I design my cards, the information provided here is base in my own opinion and creativity. I am not an expert by any means, and I only share the way that I design my cards. Most of the products used on my blog posts are personally purchased by me. However, I did receive the products by Pinkfresh Studio and WOW! Embossing Powder used on today’s blog post. Other than that, all referral links are added for you to know from where I purchased the items from as, all products shared and mentioned in each of my blog posts are simply because I use, and truly love them.


